Import Data into TeacherKit
To fasten the process of data entry in TeacherKit, you can import your data directly into your TeacherKit.
Currently TeacherKit can help you import 2 files: Student Roster and Gradebook Template.There are 2 steps you need to know to import your data:
- The guidelines of creating the files
- How to import it into TeacherKit
1. Here are the guidelines and templates for the files that can be imported:
2. Here is how to import your files into TeacherKit
There are multiple methods you can use to import your files into TeacherKit:
” Open In”, Dropbox or iTunes.
Using “Open in” feature:
- Send your .csv files (or student roaster.zip) to your e-mail or Dropbox account.
- Open your e-mail/Dropbox from your device.
- Tap and hold on your files, and “Open in TeacherKit”.
- TeacherKit will open and it will ask you to choose if you want to import this file to a new class or an existing one.
Save your file in Dropbox:
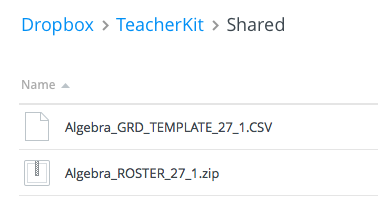
Go to your Dropbox account and add your .csv/zip files under this path: “Dropbox\TeacherKit\Shared\”.

Save your file in iTunes:
- Connect iOS device to your computer then open iTunes, select your device in iTunes.
- Open the Apps tab in the main view, scroll down to iTunes File Sharing.
- Select TeacherKit from the left table, and drop the file in the right table.

Import to a new class:
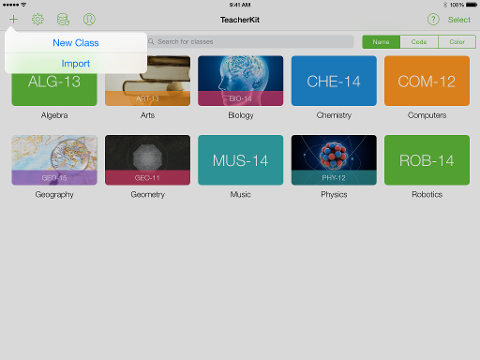
Once you open TeacherKit, it will open on the home view where you see all your classes.
Tap on “+” icon and choose “Import” to import your data that will be added to a new class.

Import to an existing class:
Once you open TeacherKit, it will open on the home view where you see all your classes.
- Tap on “Select” button (or tap and hold on any class)
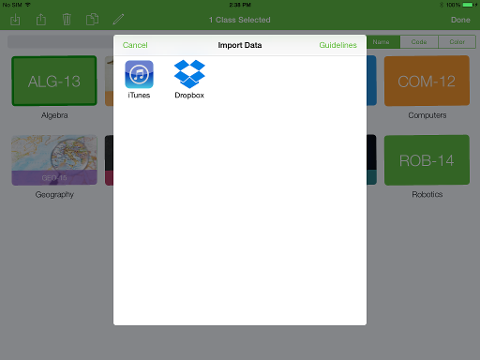
- Select a class, then tap on the “Import” icon in the top bar.
Once you do that, the “Import Data” window will be opened to you to select the source from which you want to import your data.
